The
Japanese invasion of Malaya
Seventy minutes before they attacked the
USA fleet in Pearl Harbour, Hawaii, the Japanese declared war on Britain and
its Empire by attacking the north-east coast of Malaya at Kota Bharu in
Kelantan State; the time was 0030 hours on 8th December 1941. Concurrently the Japanese invaded neutral
Thailand, landing on beaches at Singora and Patani that allowed them to quickly
cross the Kra Isthmus and invade Malaya down its west coastline. The east coast landings were a diversion from
the west coast invasion thrust but the fighting at Kota Bharu was the toughest
that the Japanese had to face in Malaya.
Several good Indian Army units fought well
at or near Kota Bharu, and some less well prepared Indian State Forces units
(supplied by Princely States) experienced difficulties in combat. In both cases the sepoys were recruited from
similar environments but on the whole standards of discipline, training,
organisation and leadership were maintained at a higher level in the Indian
Army. The sepoys should not be faulted
but those responsible for the preparation and training of Indian State Forces
for modern warfare probably themselves had little or no idea of the realities –
but the same could be said for many senior figures in the Indian and British
Armies.
This article is being written after a visit
to the main battlefield locations near Kota Bharu, and comments gleaned from
the oral history of villagers who witnessed the fighting are included; some of
these comments may appear unpalatable or inaccurate but germs of truth may be
hidden amongst them. Readers can
interpret them according to their own personal knowledge, instincts and
beliefs.
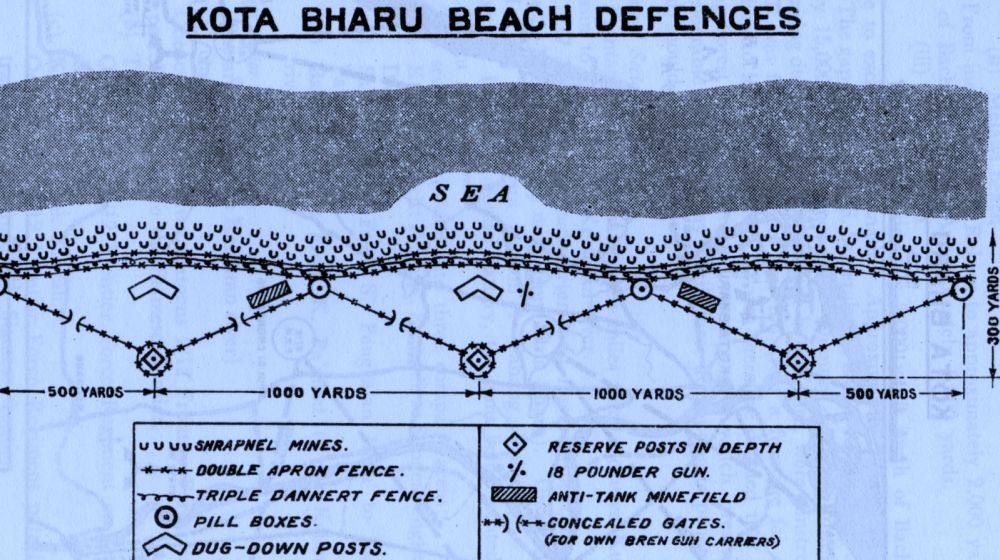
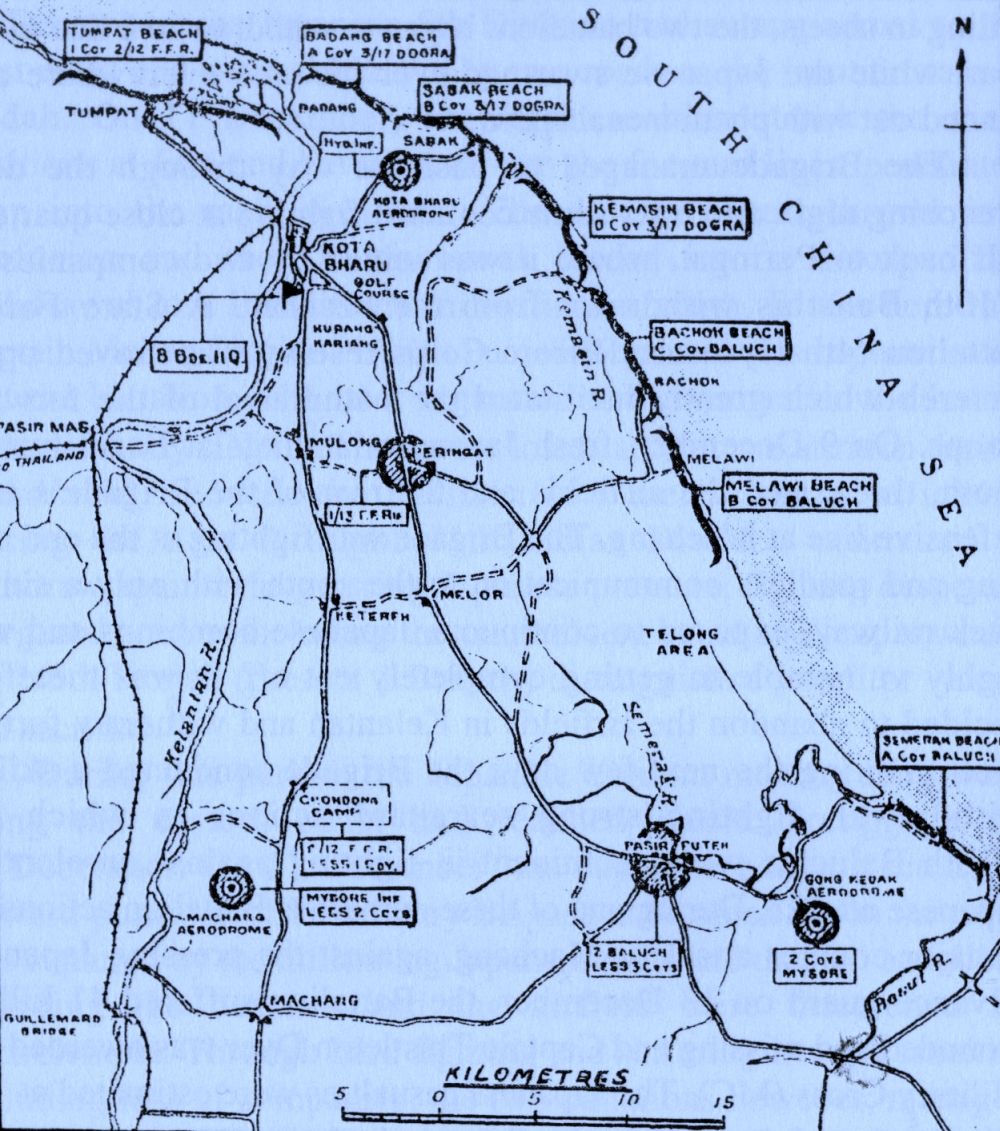
Above: Kota Bharu beach defences
The
defence of Kota Bharu
The High Command in Malaya in 1941 had
decreed that the role of the Army was to protect airfields so that the Royal
Air Force and Royal Australian Air Force squadrons in Malaya could win any
confrontation with a hostile belligerent.
Japan was an assumed enemy but the quality of both Japanese planes and
pilots was openly denigrated by senior British military figures; British air
power was going to keep Malaya safe and secure.
The formation tasked with the protection of
the airfields in and near Kota Bharu was the 8th Indian Infantry
Brigade Group commanded by Brigadier B.W. Key DSO MC. The Brigade Order of Battle and deployment on
7th December 1941 was:
·
Brigade HQ and Signal
Section. (In Kota Bahru town.) ·
Employment Platoon. (With Brigade HQ.) ·
73 Field Battery, Royal
Artillery (from 5th Field Regiment, Royal Artillery). (Brigade Reserve at Chongdong.) ·
272 Anti-tank Battery,
Royal Artillery (from 80 Anti-Tank Regiment). (Brigade Reserve at Gong Kedah.) ·
21 Mountain Battery (less
one section). (Supported units on the
beaches from Kota Bharu Airfield.) ·
9 Battery (Heavy
Anti-Aircraft) Hong Kong and Singapore Regiment, Royal Artillery. (At Kota Bharu airfield.) ·
19 Field Company, Royal
Bombay Sappers and Miners. (In Kota Bahru
town.) ·
2/10th Baluch
Regiment. (Defended southern beaches.) ·
2/12th Frontier
Force Regiment. (One company defended northern beaches to border, the
remainder Brigade Reserve.) ·
1/13th Frontier
Force Rifles. (Brigade Reserve at
Peringat with patrol base at Repek.) ·
3/17th Dogra
Regiment. (Defended central beaches.) ·
“A” Company Malaya
Regiment. (Secured Kuala Krai railhead.) ·
1st Hyderabad
Infantry, Indian State Forces. (One
platoon manning two Naval Anti-Aircraft guns at Gong Kedah Airfield, remainder
at Kota Bharu Airfield.) ·
Mysore Infantry, Indian
State Forces. (Two companies at Gong
Kedah Airfield, remainder at Machang Airfield.) ·
Two Machine Gun Platoons, 4
Pahang Volunteers. (One platoon at Gong
Kedah Airfield, one platoon with 3/17th Dogras.) ·
One Company Kelantan
Volunteers. (In Kota Bharu town.) ·
15 Indian Field Ambulance.
(In Kota Bharu town.) ·
8th Indian
Infantry Brigade Transport Company, Royal Indian Army Service Corps. (Moving to and from the Kuala Krai railhead.) ·
43 Reserve Motor Transport
Company (Malaya). (With Brigade HQ.) ·
One Labour Platoon. (With Brigade HQ.)
Above: Japanese artist's impression of landing at Kota Bharu
The beach defences were sound with concrete
pillboxes for machine gun teams that were supported by fire trenches and protected
by well-constructed wire and minefield obstacles. But the lengths of beach to be defended by
individual battalions meant that the defences were undermanned and under-gunned
and an enemy breakthrough was unlikely to be easily halted. Another weakness was the lack of booms across
the several creeks that ran into the sea; the absence of booms was attributed
to an absence of steel wire to construct them but also to a need for local
fishermen to be able to freely use the creeks.
Some dummy pillboxes were constructed where gaps in the beach defences
occurred. The beaches were sandy and
open with mangroves inland but the tidal creeks were deep and muddy, inhibiting
lateral movement.
Four ancient 18-pounder artillery pieces
were recovered from their ceremonial duties in Kelantan, they were
reconditioned and deployed on the Dogras’ and Baluchis’ beaches as direct fire
weapons. The gunners made a thorough
survey of the beaches and deployed forward observation parties. Morale amongst the beach defenders was high.
Air support was to come from Kota Bharu
Airfield where No. 1 (Royal Australian Air Force) Squadron was operating eleven
Lockheed Hudsons and three Brewster Buffaloes.
At Gong Kedah Airfield when required would be a squadron of nine
Vildebeeste Torpedo Bombers, however the torpedoes needed their targets to be
in deep water, not off shallow sandy beaches.
Action
on the beaches
Despite the prevailing Monsoon creating
heavy seas three Japanese troop ships supported by a cruiser commenced
disembarking 5,500 assault troops of the Takumi Detachment onto the beaches
nearest to Kota Bharu Airfield at 0030 hours 8th December 1941. The beach defenders were the Dogras and one
of their reconditioned 18-pounder guns soon made hits on Japanese ships and
landing craft. The machine gun fire-teams
in the pillboxes operated efficiently and used moonlight for observation to
keep the attackers on the seaward side of the wire obstacles. But an initial enemy group placed a concealed
light on the beach near the mouth of the Penkalon River and some landing craft
used this to locate and navigate up the river and into creeks to attack the
pillboxes and supporting trenches from the rear.
On the beaches Japanese infantrymen
frantically used helmets to burrow underneath the substantial wire
obstacles. Heavy Japanese naval gunfire
hit target areas creating cordite fumes within some pillboxes that made the
defenders don respirators (gas masks), which restricted communication and
vision; the defenders were convinced that the Japanese were using gas shells,
and it is possible that on some beaches they were.
By 0100 hours the attackers had captured
Nos. 13 and 14 pillboxes. ‘A’ Company
Commander, Captain Nawin Chandra, was killed in action on Badang Beach whilst
fighting from No. 14 pillbox. For the
bravery that Subadar Narayan Singh displayed during the fighting he was awarded
the Indian Order of Merit, 2nd
Class – the first Dogra gallantry award of the Malaya campaign. Sadly the citation has been lost.
Another Indian Order of Merit, 2nd Class, was awarded for the gunnery
on Badang Beach performed by Havildar Dille Ram, 3/17th Dogras. Dille Ram was the battalion gunnery
instructor who had trained sepoys in the use of the 18-pounder guns, and he had
towed targets behind a launch to simulate enemy craft whilst his trainees fired
at them. During the fighting his gun on
Badang beach hit both enemy shipping and Japanese troops ashore. His citation was lost but here is a
description of his gunnery skill written by a Dogra officer:
At one stage 400 or
500 Japs got ashore on a tongue of land on the Badang side of the creek which
divided it from the next beach. They
were hemmed in by the sea on one side, by a lagoon on the other and by the
creek at the end. Dille Ram turned his
gun round to fire along the line of the wire, inflicting extremely heavy
casualties on them concentrated in a confined space.
It seems likely that
Dille Ram’s gun sank the all important ship with the tanks and the guns. Our bombers sank a destroyer about 5am and
also hit one of the transports causing some fires. Dille Ram’s claim to have sunk the ship was
discounted at the time but later in the campaign, about two thirds of the way
down Malaya by which time we had lost all our regular officers, I shared a slit
trench for part of a night with Dille Ram and he was very put out by the
Airforce claim to have destroyed the ship.
I asked him how he could be sure when his gun was only sighted up to
2,000 yards. He explained that he had
bracketed (fired behind and in front of) the ship with shells to determine the
necessary elevation setting on the gun. He
also explained that he had left the cap covers on the shells to achieve a minor
armour piercing effect.
The
Australian air attack on the Japanese ships
No. 1 (RAAF) Squadron took off from its
waterlogged airfield just behind the beaches and used the moonlight to deliver
several successful bomb and machine gun attacks on the Japanese ships. One troop ship was hit seriously and caught
fire and was abandoned, and another and the cruiser, which retired, were
damaged. One pilot, Flight Lieutenant
Oscar Nathan Diamond, was later awarded the Distinguished Flying Cross. Two Hudsons were shot down and others
became unserviceable due to damage caused by Japanese weapons. The remaining
planes kept flying, not needing to be refuelled when they returned to base, but
just being re-armed. These air strikes
were a serious concern to the Japanese and the two troop ships that could move
sailed back into the ocean. The enemy
riposte was to deliver a large air attack on Kota Bharu Airfield the following
morning which prevented use of the runway; in the afternoon the surviving British
planes were ordered to fly to safer airfields further south.
Counter-attacks
The tide of battle had by then turned in
the enemy’s favour and further landings were made on the captured beaches. Brigadier Key ordered counter-attacks and ‘B’
Company 2/12th Frontier Force Regiment advanced on Sabak Beach,
relieving No. 12 pillbox which had been isolated by the enemy. Further attempts to advance and re-take No.
13 pillbox were halted by the Japanese 250 yards short of the objective;
meanwhile more Japanese troops and heavy weapons were being landed.
The Dogras’ Commanding Officer, Lieutenant
Colonel G.A. Preston, had accompanied the counter-attack but he was wounded and
had to be evacuated. Major Oliver Brian Masters North took over command of 3/17th
Dogras and exercised calm and skilful control for the remainder of the battle,
resulting in him being awarded the Military
Cross (citation lost).
The counter-attack could not regain
momentum and later in the day ‘B’ Company was ordered to withdraw, but by then
the enemy had worked himself around the sepoys’ inland flank, causing casualties
as the Company retired. More sepoys were
lost when they drowned trying to swim the Gali River; originally this had been
crossed by using a small boat but the Japanese sank the boat with gunfire. For the leadership that he showed throughout
the Day, ‘B’ Company Commander, Subedar Mohammed Ali Khan, was awarded the Indian Order of Merit, 2nd Class,
but unfortunately the citation has been lost.
‘A’ Company 2/12th Frontier
Force Regiment moved across to Smugglers Island to clear it of enemy, but with
only half that task completed the Company Commander, Captain K.C. Medappa, was
killed by fire from a boat heavily camouflaged with branches. Subadar Siri Chand took over command and with
his two platoons held his half of the island for the following few hours, but
Japanese fire prevented forward movement.
Lieutenant Colonel C. Gilbert, commanding
1/12th Frontier Force Rifles, was then tasked with counter-attacking
Badang Beach, west of Sabak. The sepoys
had to debus a mile from the objective as roads were flooded, preventing the
use of carriers. Colonel Gilbert advanced
from the west whilst Lieutenant Colonel A.E. Cumming MC, commanding 2/12th
Frontier Force Regiment, advanced with some of his men from the east. But
impassable terrain in the form of creeks prevented the two units from ever
meeting. Gilbert prepared to attack a
captured pillbox and sent his Adjutant in a local boat to order forward more
men; the Japanese captured the boat and killed the Adjutant, Captain Paul Brian
Gell. Colonel Gilbert halted his mission
at last light and during the next day marched back to Chondong where the front
line then was.
After failing in its counter-attack role,
primarily because of the terrain to be crossed, 2/12th Frontier
Force Regiment moved back in torrential rain to hold a line near the Airfield
to stop Japanese infiltration from Sabak Beach.
Lieutenant Colonel Cumming had his life saved by Captain
B.I. Richardson of the Dogras who tommy-gunned a group of Japanese whilst
Jemadar Khushi Ram of the Dogras extricated Colonel Cumming and his party. Captain Bernard Ian Richardson was killed in
action during this incident.
The Dogra platoon of ‘C’ Company patrolled
forward using a boat but on its return journey an enemy aircraft saw the boat
and sank it. The patrol commander,
Jemadar Parmodh Singh, spent up until midnight getting his men back through the
mangrove swamps to a pontoon bridge.
Above: Sabak Beach
A
Distinguished Service Order for the Dogras
Lieutenant Colonel George Allan Preston was
later appointed to the Distinguished
Service Order (DSO) with this citation:
The
3/17 Dogra Regiment were on the defence of the coast covering the aerodrome at
Kota Bharu in Kelantan. The enemy attack
came in on this front and suffered very heavy casualties due to the staunchness
of the Dogras who were holding the position on the beach. It was due to the fine leadership and quick
grasp on the situation by Lieutenant Colonel Preston that the enemy were
prevented from extending his preliminary successes on Sabang beach. Lieutenant Colonel Preston himself led
forward troops for the counter attack. When
the attack was held up Lieutenant Colonel Preston went forward to ensure that
the objective was captured and in doing so was wounded. In spite of this he remained in position to
encourage his troops until he was forced to the Regimental Aid Post. He rejoined his Battalion a fortnight later
and continued to show fine powers of leadership and spirit which was reflected
throughout the unit. He was again
wounded and cut-off in January but was not captured by the enemy until
approximately 15th April, some three months later.
Oral
History from local villagers
Many Dogra defenders still held their isolated
positions in the afternoon of the 8th December and for the next day
or two, but when their ammunition was expended, or they realised that the
Japanese controlled the area, they attempted to surrender. These points have been passed down by word of
mouth amongst the local villagers:
§ The
Japanese refused to accept some prisoners and entered some pillboxes and
bayoneted the defenders to death. The
villagers could hear the sepoys screaming.
§ Villagers
were sent into the pillboxes to clear up the mess, and the blood on the floors
was ankle-deep.
§ One
dead sepoy was chained to his machine gun.
§ Some
sepoys attempted to escape by swimming across the creeks but nearby villagers conspired
to drown the sepoys in the creeks to avoid Japanese retribution for them
helping the British.
21
Mountain Battery during the beach fighting
The Battery had observation posts (OPs) on
Sabak and Badang beaches but access was difficult due to pounding Monsoon rain
and flooded muddy creeks. The OP on
Badang Beach reported that the first shot of the Malaya campaign was fired by
an 18-pounder gun manned by 3/17th Dogras. Both OPs requested and received fire
missions, Badang Beach claiming hits on the enemy troopship which caught
fire. Lieutenant Tombs on Sabak OP fired
a box barrage around his location as he saw the Japanese capturing pillboxes
and getting behind him. Later in the
morning 2nd Lieutenant Elliott replaced Lieutenant Tombs in the
Sabak OP.
In the Badang OP Jemadar Gurmuk Singh soon
had his telephone wire cut, making him redundant for gunnery but as enemy
troops approached he led a pillbox fire team and gave fire control orders for
the Dogra mortars. He personally killed
three Japanese with a Bren gun as they attacked his post. Through infantry communication channels he
was ordered to withdraw and he got his team and the vehicle back to the
Battery.
2nd Lieutenant Elliott carried
on in Sabak OP and was of use to the 2/12th Frontier Force
counter-attack. Meanwhile back at the
gun line ammunition nearly ran out before 8 Transport Company delivered a
resupply from the Kuala Krai railhead.
21 Mountain Battery’s comment on the British Army 73 Field Battery,
Royal Artillery, (eight 4.5-inch howitzers) was:
“Their
OP joined Elliott at SABAK, but their wireless never worked, nor did they ever
succeed in laying a line.”
But the situation changed when 21 Mountain
Battery, because of enemy sniping, moved back to join 73 Field Battery in
Montgomery camp. Elliott was then able
to shoot both batteries using a Brigade signals cable that was already laid. At around 2200 hours 21 Mountain Battery was
ordered back to Chondong. 2nd
Lieutenant Elliott joined a few hours later with all his equipment; his truck
had been captured but his driver, Lance Naik Sadhu Singh, escaped and later
rejoined the battery.
Meanwhile the Japanese were not without
their own problems, and at one time they had to cease advancing because of
heavy casualties both from drowning in rough seas and from British fire. They had to reorganise two very depleted
brigades into one before the advance could be continued.
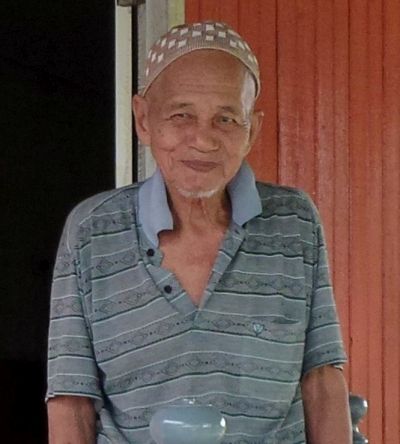
Right: Omar Bin Senik. As a boy he watched the invasion
Chaos
on Kota Bahru Airfield
Putting it mildly, things did not go well
on Kota Bahru Airfield in the afternoon of 8th December, despite the
heroic efforts of the pilots who had since been ordered to fly south. To quote from the British Official History:
The airfield was
bombed and machine-gunned at frequent intervals throughout the day with
consequent casualties and damage to aircraft.
At about 4 p.m. a rumour began to spread on the airfield that enemy
troops had broken through and reached the perimeter defences. This was not in fact the case, but the
passage of stray bullets probably gave credence to it and resulted in some
unauthorized person giving instructions that the denial scheme was to be put
into effect. The airfield buildings were
set on fire and the station staff began to evacuate the airfield. A joint reconnaissance by the brigadier and
the wing commander proved that the rumour was false, but the damage was done,
and by 6.15 p.m. the station and squadron maintenance staff had left in transport
for the railhead at Kuala Krai. Although
they had set fire to the operations room and to most of the stores, they had
failed to destroy the stocks of bombs and petrol or to make the runways unfit
for use.
During the Japanese bombing raids a crowd of local Malays came to watch, as though it
was a football match. Army spectators of
the air force withdrawal are unanimous in mentioning chaos, panic and lack of
discipline, especially when the serviceable aircraft had been ordered to fly
further south. An air force Board of
Inquiry held later did not endorse the word panic, but it failed to explain why
the bombs, fuel and runways had not been destroyed.
There was no enemy ground attack on the location
until later that evening when British units became intermingled in the dark;
after heavy fighting the Japanese seized the airfield. Before that 73 Field Battery had been given a
target that its howitzers could not miss, as the battery was ordered to
directly fire at the fuel tanks to destroy them and their contents.
The Indian State Forces unit 1st
Hyderabad was defending the airfield and it became unsettled because of the
precipitous flight of the Australian Air Force ground crew, and some sepoys
deserted their posts. It has been
alleged since by historians that the Commanding Officer, Lieutenant Colonel
Charles Albert Hendrick, 3/17th Dogras attached to 1 Hyderabad, and
his Adjutant were killed when they attempted to stop troops from retiring in
disorder. Colonel Hendrick was killed but
how he died is not proven and he could have been killed accidentally by another
unit in the darkness or deliberately by the Japanese. His Adjutant was not killed and in Appendix 2
to this article is a citation for an award to that Adjutant and other Hyderabad
officers for noteworthy behaviour whilst in captivity.
Three brave and courageous men of the
Hyderabads received gallantry awards.
Lance Naik Zubiulla Khan was awarded a posthumous Indian Order of Merit, 2nd Class. Subadar Major Shaikh Mohammed and Jemadar
Shaikh Ahmed each received the Indian
Distinguished Service Medal. The
citations for all three awards have been lost but as 1 Hyderabad was not
committed to any further combat duties in Malaya we can confidently assume that
the three awards were made for acts of gallantry at Kota Bharu Airfield.
British
withdrawals
When Kota Bharu Airfield was lost Brigadier
Key issued orders for a series of withdrawals in an attempt to save as much as
he could of his Brigade Group. Many
units were not only out of contact with Brigade HQ but also out of contact with
sub units, but common sense dictated that the safest route lay to the south,
and there the sepoys trekked throughout the rain-drenched night. The Japanese followed hard on the heels of some
units and fierce little fights sometimes developed.
Because of the disorganisation and lack of
effective communications strength returns from the infantry battalions tended
to be very low, and for a time it was feared that the Brigade Group had been
decimated, but over the next 48 hours hundreds more sepoys appeared and the
fears of heavy losses were proved to be false.
What must be appreciated is the morale of the sepoys which remained
high, and their sense of discipline which was retained, although many of them
had lost their weapons and boots whilst floundering to survive in the muddy
tidal creeks. These men were from some
of the best units in the Indian Army; they knew that and they did not let their
regiments down. As an illustration the
Dogras first reported 400 men as casualties but over the next 3 or 4 days 200
of these trickled back to the unit. Some
Dogras in fact ‘went native’ and lived the war out disguised as members of
local Malay communities.
Major G.J. Hawkins of 2/12th
Frontier Force Regiment was awarded a Military
Cross later in the campaign and the first paragraph of his citation reads:
Throughout
the campaign this officer showed courage and powers of leadership of a high
order. On 9 December during the
withdrawal from Kota Bharu aerodrome it was this officer’s efforts under heavy
fire that resulted in the maintenance of communication with Brigade HQ. Later, he commanded the rear party, and by
his skill and coolness completed difficult operations with complete success.
The Indian Official History states:
12 and 13 December
were field days for the Baluch Regiment, which with 2/12th Frontier
Force Regiment acted as the rearguard in contact with the Japanese
patrols. The Baluch companies fought
hard and inflicted severe losses on the Japanese while themselves suffering
some losses. The ground was appallingly
bad after the rains and with a waist-deep canal to cross besides.
The Japanese were
also using armour piercing ammunition in their rifles and light automatics,
against which the thin walls of the Bren Gun Carriers afforded no
protection. At the end of the day on 13
December, the Baluch withdrew to Milestone 34.5 and very soon after was joined
by 2/12th Frontier Force Regiment on the right of the road, while
3/17th Dogra and 1/13th Frontier Force Rifles went in
reserve behind the brigade headquarters, with enough artillery for the forward
battalions.
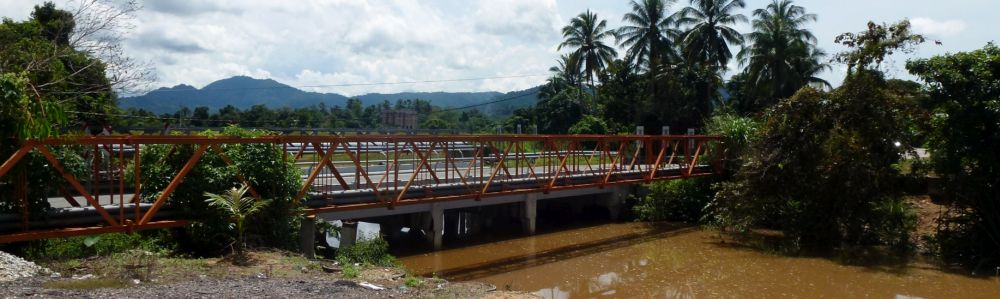
Above: Site of the prematurely demolished bridge Machang
The action at Machang
The airfields at Machang, and Gong Kedah had been protected by two companies each of the
Indian State Forces unit The Mysore Infantry.
Both airfields had been bombed by the Japanese and the Mysore sepoys had
suffered at Machang, particularly when they believed that enemy smoke bombs
were gas bombs. The sepoys had lost
their discipline and suffered 35 casualties from high-explosive bombs, which lowered
their morale considerably.
Another problem at Machang had been another
loss of discipline that led to a bridge over a river being blown prematurely
whilst several hundred sepoys and their transport were on the wrong side of it. 19 Field Company, Royal Bombay Sappers and
Miners, had to quickly construct a diversionary route that succeeded in getting
the vehicles across the river.
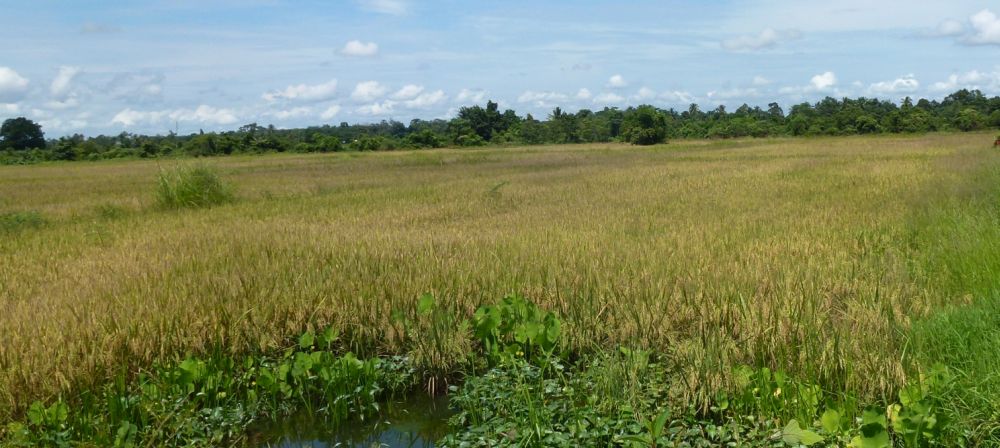
One of the successful Baluch actions
mentioned above occurred at Machang on 13th December. Supported by 21st Mountain Battery
‘A’ and ‘D’ Companies of 2/10th Baluch attacked across paddy fields to
seize enemy-held woods at Machang and claimed around 100 Japanese killed
against their own losses of 18 sepoys killed, 38 wounded and 7 missing. Lieutenant John Hooker Thiselton-Dyer, 10th
Baluch Regiment (‘A’ Company Commander), was awarded a Military Cross (citation lost) for his bravery during the
counter-attack.
Just after the Baluch attack had gone in an
interesting incident occurred which is described in the History of 21st
Mountain Battery:
While waiting to
follow up this attack, Brigadier Key, the Commanding Officers of 2/12th
Frontier Force Regiment and 2/10th Baluch, and the Battery Commander
were fired at at 10 yards range by a Japanese concealed under a pile of
brushwood. None were hit. The Japanese, however, was partially
destroyed by bombs (grenades) and
tommy guns and pistol fire, and was removed to SINGAPORE, where he survived to
be one of our few prisoners.
Above: Location of Baluch attack across paddy fields at Machang
British
withdrawal from Kelantan
Brigadier Key had got his Brigade Group
back together again and he made a clean break with the enemy and evacuated his
men, guns and most of his military vehicles by rail from Kuala Krai. British aviators were no longer using
airfields in Kelantan so there was no need to keep the Brigade Group out on a
limb.
Above: Sketch of deployment of 8 Indian Infantry Brigade in Kelantan
Some historians state that at this stage 1st
Hyderabads was disarmed and in future used as military labour. If they were disarmed it was probably not to deny
the sepoys the chance to shoot other commanding officers, but a far more likely
reason is that the Indian State Force units did not practise disciplined fire
control; throughout the nights ISF sepoys on sentry duty could be heard firing
at shadows, rustling palm leaves, domestic buffaloes and anything else that
moved. This constant firing kept the
other troops in the vicinity awake most of the night.
Perhaps the last word should go to the
brave and dedicated Japanese soldiers of the Takumi Detachment who lost many
men by drowning during the landing operations.
But they persevered and built up their strength in the creeks and on the
islands along the coast until they were strong enough to advance and take their
prize – Kota Bharu Airfield, which the Japanese air force soon put to good use. They then followed up the British withdrawal
closely and were always looking for a fight.
They were deception troops, whose mission was to keep their enemy active
on the east coast whilst the west coast invasion force sped south, and they
succeeded in that mission. Their losses
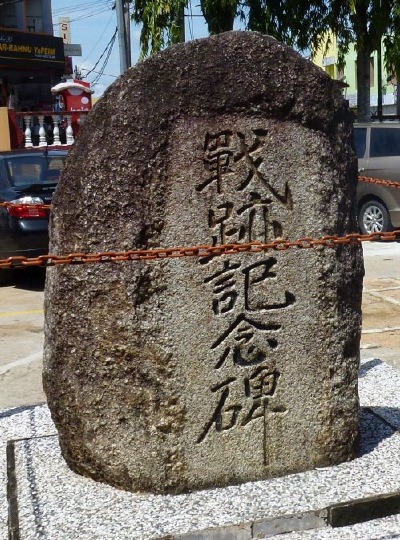
were 3,500 men killed and many more wounded; they later erected memorials in
the Kota Bharu area to commemorate their dead.
The Japanese considered that the Kota Bharu
fighting was the toughest of the whole Malaya campaign.
Endnote
My visit to the Kota Bharu battlefields was
managed by local resident, military historian and battlefield guide Zafrani
Arifin, and it would not have been successful without his invaluable local
knowledge and assistance. I strongly
recommend him as a guide to anyone with military interests visiting the Kota
Bharu area. He can be contacted through
Facebook where he is a prominent contributor to the Malaya Historical Group
forum. Well Done Zaf!
Left: Japanese War Memorial Machang
APPENDIX
1. Further
actions of 3/17th Dogra Regiment
3/17th Dogras were moved to the
west coast of Malaya and deployed in the defence of Kuala Lumpur. As Colonel Preston’s DSO citation intimates
the Battalion was involved in heavy fighting near Serendah, and two companies
and Battalion HQ were cut off and lost.
The Indian Official History states:
The other battalions
arrived and opened attacks upon the Japanese, but had to fall back when faced
with the danger of getting trapped themselves.
. . . but 3/17 Dogra Regiment was badly caught in the Japanese net. Its ‘D’ Company entered the heart of the
village which was full of the Japanese.
From houses, from behind walls and hedges, from the trees and from the
drains, they opened up a fusillade and decimated this company. Even ‘B’ Company was gone and the battalion
took shelter in the wilderness.
Only the carrier platoon got away, and the
following citations to the Carrier Platoon Commander and to a Havildar may be
of interest:
1.
Military
Cross to Captain Angus Frederic Ward.
On Jan 10th 1942,
at SERENDAH, when in command of the Carrier Platoon he covered the rear of the
Battalion while they attacked the village of SIMPANG CHOH where the Japanese
had cut the line of withdrawal, and subsequently under fierce fire succeeded in
leading the carrier platoon through the midst of the enemy lines.
By so doing he was able to rally the remnants
of the Bn and take command till the end of the campaign. Throughout this period
he showed exceptional powers of leadership for a junior officer and it was his
example which enabled the Battalion to continue fighting as such.
2.
Military Medal to No. 6198 Havildar
RATTAN SINGH, 3/17th Dogra Regiment.
Havildar
RATTAN SINGH was not captured by the Japanese until 4 months after the
capitulation of Malaya, remaining during this time stoically by the side of his
Commanding Officer, attempting to evade capture. Eventually
he was shipped to NEW GUINEA and in September 44 during a move from RAWAN to
MAPRIK he and 27 Indian Other Ranks escaped, the Havildar, who possessed a
compass, acting as leader. All
went comparatively well, though the journey was extremely hard and it was
difficult to feed the party on roots and berries in the jungle, until a
fortnight later they entered an apparently abandoned Japanese Camp. Here they were suddenly challenged by a
Japanese Captain and his Batman, but Havildar RATTAN SINGH called on 4 Indian
Other Ranks to seize them and he himself beheaded them both with a “dah”. He then led the party on and after another
hard two days they were recovered by an American Patrol. Havildar
RATTAN SINGH showed remarkable qualities of leadership and steadfastness both
during the actual escape and all through the extremely hazardous journey they
undertook, and to date his is the only authenticated record of an Indian
prisoner of war recovered from South West Pacific Area who has taken extreme
measures against the Japanese to facilitate escape. For his courage, powers of leadership and
devotion to duty it is considered that he should be awarded the Military Medal.
Above: A creek obstacle
APPENDIX
2.Awards
made to 1st Hyderabad Regiment (Indian State Forces)
As well as the Indian Order of Merit, 2nd
Class, posthumously awarded to Lance Naik Zubiulla Khan and the two Indian
Distinguished Service Medals awarded to Subedar Major Shaik Mohammed and
Jemadar Shaikh Ahmed, three 1st Hyderabad officers received awards
for gallant and distinguished conduct whilst prisoners of war following the
British surrender in Singapore. Their
citations are shown below.
1.
2nd Lieutenant BADRUL GHANI
received a Military Cross (upgraded
from the suggestion of a Mention in Despatches):
2nd Lieutenant Badrul Ghani was captured at
the fall of Singapore. At the end of
April he was detailed to take charge of a fatigue party required by the
Japanese to go to Happy Valley to clear bomb debris. On arrival at the station they were paraded
in the ticket office and while waiting for orders Lieutenant Badrul Ghani
strolled calmly through the next room where two Japanese soldiers were sitting
and still wearing uniform, made his way back to Singapore unchallenged. Once there he procured a fez, shirt, coat and
disposed of his uniform in the town drain. For a week he remained hidden in a mosque, trying to
discover a means of crossing to the mainland.
Eventually he contacted an Indian Baker who arranged with a Chinese
fisherman to take him over, and he landed safely about May 5th,
42. Lieutenant Badrul Ghani’s father had
been a doctor and he himself had picked up enough medical knowledge to get
himself taken on as an assistant, and by this means managed to accumulate
sufficient funds to continue his journey three months later. He had by then grown a beard and was living
under an assumed name. He took with him
a large stock of medicine which proved extremely useful later on when a train
he was travelling on was searched by the Japanese and he was able to convince
them that he was a Doctor. He travelled by train as far as PENANG and was then
taken on as far as MOULEIN in a rice boat – expenses paid by a grateful
patient. From Moulein he again went by
train, this time to OKKYIN, Mandalay, by sampan to SAGAING and so to
RAHIMNAGAR, the whole journey having taken nine months to complete. It is considered that for the courage and
determination of Lieutenant Badrul Ghani displayed in achieving his escape and
reaching his goal at the end of his very long and difficult journey he should
be awarded a Mention in Despatches.
Left: British pillbox Machang Airfield
1.
Lieutenant Colonel SYED
MOHAMMED ISHAQ was appointed to be a Member
of the Order of the British Empire (MBE).
15
Feb 42 – 1 May 43 SINGAPORE The
surrender at SINGAPORE brought fresh troubles as the enemy handed over all
Indian prisoners of war to a Captain MOHAN SINGH, 1/14th Punjab
Regiment. However Lieutenant Colonel
SYED MOHD ISHAQ at every possible occasion exerted his influence not only over
the men of his own Battalion, 1 HYDERABAD INFANTRY, but on all others of the
Indian Army and Indian State Forces whom he came in contact to prevent them
joining the Indian National Army. It was
chiefly due to his influence that not a single Officer or Other Rank of 1
HYDERABAD INFANTRY joined the Indian National Army but remained true to KING &
COUNTRY. This brought added hardship to
him and his men but there was no wavering.
He
was put in command of SALITAR camp, the non-volunteer camp. The other two, NEESOON and BIDA DARI were the
seat of the rebel Indian National Army Organization. Personnel of the HONG KONG AND SINGAPORE
ROYAL ARTILLERY in SALITAR Camp, who refused to join the Indian National Army
were marched off to a special CONCENTRATION Camp and put under pressure. Some even being shot. However they refused to listen to anyone
except Lieutenant Colonel SYED MOHD ISHAQ.
When the question arose of transferring them to TENGA AERODROME Camp,
they refused to go until they were told that the 1 HYDERABAD INFANTRY were also
being transferred there. The
1 HYDERABAD INFANTRY were then left out of the orbit of the Indian National
Army’s efforts as also others in the TENGA AERODROME Camp. In fact non-volunteers of the Indian Army
were continually trying to get to TENGA for this reason. Lieutenant
Colonel SYED MOHD ISHAQ risked everything in keeping his own Battalion and
others loyal to the CROWN, an outstanding example of courage and devotion to
duty.
2.
Captain DOUGLAS ROBERT
MUNRO, believed to be the Adjutant of 1st Hyderabad, also was
appointed to be a Member of the Order of
the British Empire (MBE).
1
Mar 42 -30 Apr 42. TAIPING MALAYA Captain
D.R. MUNRO continually openly lectured to Indian Army personnel against the
Indian National Army culminating in SEPOY SULTAN SINGH, 5/14th
PUNJAB REGIMENT and LANCE NAIK RANSI RAM, 3/17th DOGRA REGIMENT
reporting Captain D.R. MUNRO to CAPTAIN MOHAN SINGH and CAPTAIN HABIB UR RAHMAN
of the Indian National Army who handed him over to the Japanese for punishment
because of interference with the Indian National Army. The Japs sentenced him to death with the
option of joining the Indian National Army but he preferred death. On the intervention of certain King’s
Commissioned Officers in the camp his sentence was commuted to 3 months
Rigorous Imprisonment with the option of joining the Indian National Army. He still refused and underwent the
imprisonment in the convict prison TAIPING.
Part of the sentence was commuted, the actual period of imprisonment
being from 2 May 42 – 16 Jul 42 was undergone in the condemned cells adjoining
the hanging room in the convict prison TAIPING, MALAYA.
During
the period of imprisonment in these cells this officer was humiliated and
amongst other things was made to remove human manure in buckets that would be
accumulated daily.
But
he still refused to join the Indian National Army. It
would be impossible to describe the horrible torture mental and physical, but
even so loyalty meant more than life to this gallant officer.
SOURCES:
Ø Major General Rafiuddin Ahmed. History of the Baluch Regiment 1939-1956. (Naval & Military
Press softback edition). Ø K.D. Bhargava MA & K.N.V. Sastri PhD. Official History of the Indian Armed Forces
in the Second World War 1939-45. Campaigns in South-East Asia 1941-42.
(Pentagon Press reprint, Delhi 2012). Ø Brigadier W.E.H. Condon OBE. The Frontier Force Regiment. (Gale & Polden 1962) and The Frontier Force Rifles 1849-1946.
(Naval & Military Press softback edition). Ø Peter Elphick. Singapore.
The Pregnable Fortress. A Study in Deception, Discord and Desertion.
(Hodder & Stoughton 1995). Ø General
Sir Martin Farndale. History of the Royal
Regiment of Artillery. The Far East Theatre 1941-46. (Brassey’s revised
edition
2002). Ø Brian
P. Farrell. The Defence and Fall of
Singapore 1940-1942. (Tempus
softback edition 2006). Ø Sir
Andrew Gilchrist. Malaya 1941. The Fall
of a Fighting Empire. (Robert Hale 1992). Ø Brigadier
General C.A.L. Graham DSO OBE DL psc. The
History of the Indian Mountain Artillery. (Gale & Polden 1957 and
available on the internet). Ø Richard
Head and Tony McClenaghan. The Maharajas’
Paltans. A History of the Indian State Forces 1888-1948. (Part I).
(Manohar, Delhi 2013). Ø Major General S. Woodburn Kirby. UK Official
History. The War Against Japan. Volume 1: The Loss of Singapore. (Naval
& Military Press softback reprint). Ø Compton
Mackenzie. Eastern Epic. (Chatto
& Windus 1951). Ø Colonel
R.D. Palsokar. A Historical Record of the
Dogra Regiment. A Saga of Gallantry and Valour 1858-1981. (The Dogra
Regimental Centre, Faizibad 1982). Ø Shankar
Prasad. The Gallant Dogras. An
Illustrated History of the Dogra Regiment. (Lancer 2008). Ø Colin
Smith. Singapore Burning. Heroism and
Surrender in World War II. (Viking 2005). Ø Peter
Thompson. The Battle for Singapore. The
True Story of Britain’s Greatest Military Disaster. (Portrait 2005). Ø History of 21st
Mountain Battery extract, officers’ reminiscences and
unit war diary entries obtained from The Liddel Hart Centre for Military
Archives, King’s College, London.

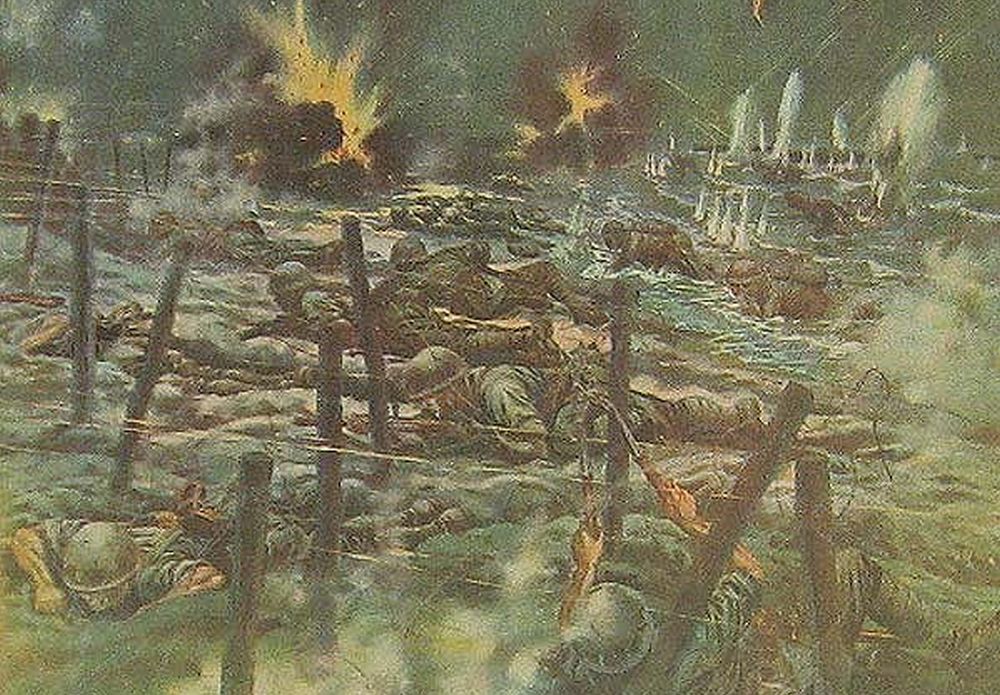 Above: Japanese artist's impression of landing at Kota Bharu
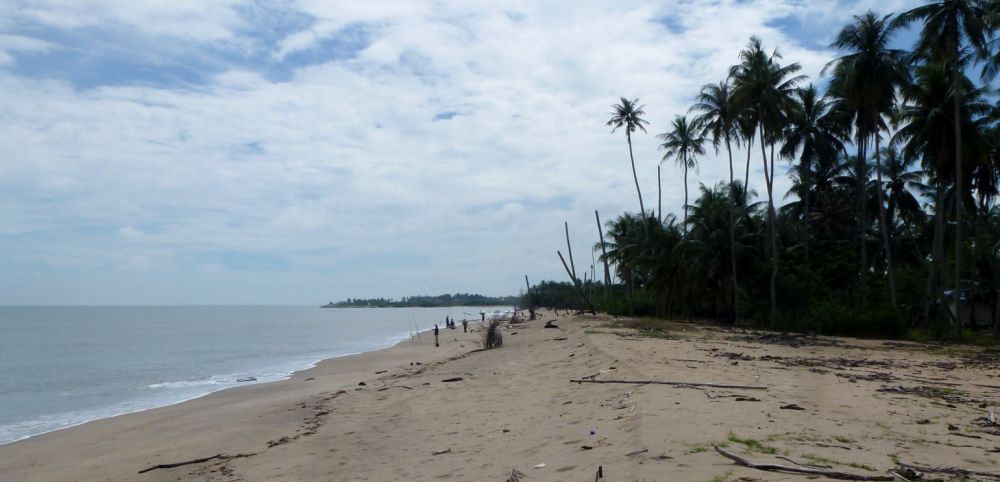
 Perhaps the last word should go to the
brave and dedicated Japanese soldiers of the Takumi Detachment who lost many
men by drowning during the landing operations.
But they persevered and built up their strength in the creeks and on the
islands along the coast until they were strong enough to advance and take their
prize – Kota Bharu Airfield, which the Japanese air force soon put to good use. They then followed up the British withdrawal
closely and were always looking for a fight.
They were deception troops, whose mission was to keep their enemy active
on the east coast whilst the west coast invasion force sped south, and they
succeeded in that mission. Their losses
were 3,500 men killed and many more wounded; they later erected memorials in
the Kota Bharu area to commemorate their dead.
Perhaps the last word should go to the
brave and dedicated Japanese soldiers of the Takumi Detachment who lost many
men by drowning during the landing operations.
But they persevered and built up their strength in the creeks and on the
islands along the coast until they were strong enough to advance and take their
prize – Kota Bharu Airfield, which the Japanese air force soon put to good use. They then followed up the British withdrawal
closely and were always looking for a fight.
They were deception troops, whose mission was to keep their enemy active
on the east coast whilst the west coast invasion force sped south, and they
succeeded in that mission. Their losses
were 3,500 men killed and many more wounded; they later erected memorials in
the Kota Bharu area to commemorate their dead.
 Left: British pillbox Machang Airfield